-->
no
no
no
no
no

Apply US Visa, Interview, Guide and Tips US Embassy Singapore

No comments
Apply US Visa, Interview, Guide and Tips US Embassy Singapore
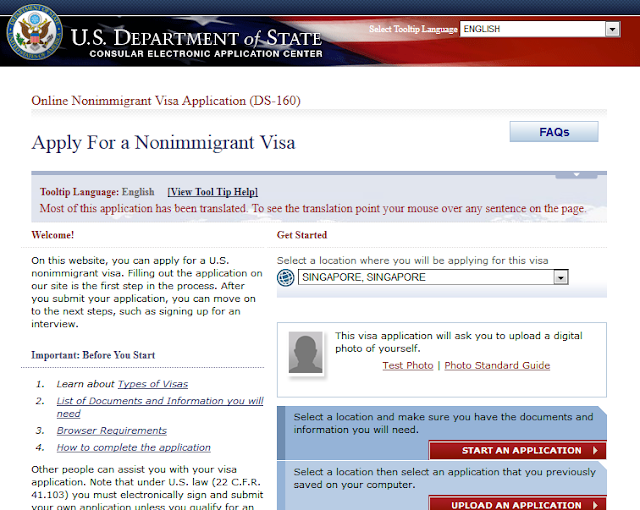
If you haven't apply the US visa, please take a look at this post How to Apply for Business or Tourist US Visa in Singapore?

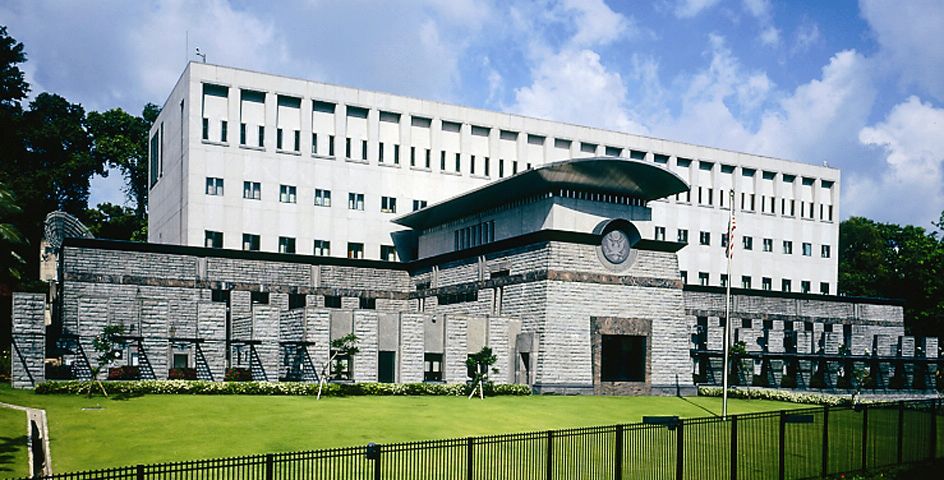
Some tips and guide that you can follow after you've appointment in the Singapore US Embassy. Here is the guide what to do after you arrive at the US embassy in Singapore.

Guide:

  1. come early at least 30 minutes before.  You need to queue outside before you can enter the embassy for security screening. After the gate on your left there are seats, proceed over there don't go straight to the queue where people are standing.  - waiting time in the morning 7.45am is about 15-30 minutes.
  2. Security screening, you'll need to leave your handphone and bulky items (some handbag and backpack will be considered as a bulky item). Since you can bring your handphone inside, don't forget to bring some books / newspaper with you.
  3. After the screening, Proceed and follow the sign (enter the door and turn to your left)
  4. At the waiting room, pick up your queue number (non-immigrant) from the queue machine. Find a sit and wait for your turn.
  5. You'll be called 3 times. 
    • First is for document submission, 
    • second for finger print
    • Third for interview.
  6. Document submission, you need to have your ds-160 confirmation, appointment confirmation, passport and 1x pass photo . After submission go back to your seat and wait your number to be called for the next step.
  7. Finger print, go with this sequence: left 4 fingers, right 4 fingers and 2 thumbs, he/she will pass you back the verified documents  and passport in a folder, go back to your seat and wait for the interview.
  8. Interview, it will be done in the same room over the counter, pass the folder (the ds-160, appointment letter and passport) back to the interviewer. Counter 1 which looks like small room has a door and chair but no one close that during interview and counter 5 is a standing counter, my point here is basically during the interview everyone in the waiting room can hear you :( so don't speak too loud.
  9. The interview always cover the basic such as your purpose to visit USA, how long you'll be there,etc. it can be short or long depends whether you've credibility. It's always good to bring letter from company that support your business trip, agenda, itinerary, hotel booking although it's not required. For US tourist visa bring your bank account statement and other supporting document.  He/she will immediately tell whether they approve or reject your visa. 


Tips:  

  1. Bring a book / newspaper, for all the 3 steps it takes about 1.5 hour . If you forget don't worry there are TV in the waiting room that showing the steps before interview and some info about living in the U.S.
  2. Always come early and take the earliest slot for appointment, the sitting in the waiting room is limited, a lot of people were standing after 8.30am.
  3. If you forget to take pass photo don't worry, there's a id photo booth inside the waiting room. The only thing you need to worry that it costs $10 for 2x pass photo. 

How to Apply for Business or Tourist US Visa in Singapore?

No comments
How to Apply for Business or Tourist US Visa in Singapore?
How to apply for business or tourist visa in Singapore? It's not that difficult to apply for Business / Tourist US Visa in Singapore, most of the work will be done online.

1. Check whether your country is eligible for US visa waiver program

With this program you can stay at US for 90 days without obtaining a Visa. check this US Visa waiver program link. if you are eligible you can proceed to Electronic System for Travel Authorization (ESTA).

2. If you required the US Business / Tourist Visa

most likely you'll be under non-immigrant visa and required B1/B2 category.  check this link for more information about B1/B2 category.  if you want to see the whole category of the non-immigrant Visa you may check this link.

The B-1/B-2 visitor visa is for persons desiring to enter the United States temporarily for business (B-1) or for pleasure or medical treatment (B-2). Generally, the B-1 visa is for travel to consult with business associates, to attend scientific, educational, professional or business conventions/conferences, to settle an estate or to negotiate a contract. The B-2 visa is for travel that is recreational in nature, including tourism, visits with friends or relatives, medical treatment and activities of a fraternal, social or service nature. Often, the B-1 and B-2 visas are combined and issued as one visa, the B-1/B-2.

3. Fill in the DS-160 Online form

what are the information that you need?
  • Passport details 
  • Travel itinerary (flight, address where you will stay in US, etc) 
  • Dates of your last five visits or trips to the United States, if you have previously traveled to the United States. You may also be asked for your international travel history for the past five years. 
  • Résumé or Curriculum Vitae - You may be required to provide information about your current and previous education and work history. 
  • Family information (your parent, sibling, spouse and children)
Important: 
  • Remember your ID number. When you begin a new DS-160, you will be issued a unique application identification (ID) number after selecting and answering a security question. Once you have your application ID number and have selected and answered a security question, you may exit the DS-160 application and return to it later. You must have your application ID to return to your application. To save your DS-160 to the Consular Electronic Application Center website, click the “Next” button at the bottom of each page you complete. You have 30 days to return to a partially completed application. To access your application after 30 days, you must save it to your computer hard drive or a disk
  • After you finish your online form before you do the submission, please "save application to file" keep it just in case in the future you need to apply another visa, you can simply upload this data for the new visa application. 
  • Print out the confirmation page with the bar code on it (not the whole DS-160 form) 
click here to access the DS-160 online form.

4. Create a online profile 

to schedule an appointment go to this site.


A MRV fee payment receipt number is required to book an appointment, you can proceed to step no 5 for the payment information. You must wait for 4 hours from the time you paid your fee before you can schedule your interview.

5. US Visa Payment

You can do online transfer through Standard Chartered Online Banking or direct payment at the Standard Chartered Bank Branch .

For Online Payment.
You need to have SCB online banking, click here for the guide.


For direct payment.
you need to print the deposit slip, click here for the guide. for more information about SCB branches click here.

Below is the list of SCB Branches that WILL NOT be accepting MRV fee payments, over the counter (OTC)

 - Ion Orchard, 2 Orchard Turn #B1-16
 - Serangoon Garden, 67 Serangoon Garden Way
 - Sixth Avenue, 795/797 Bukit Timah Road

Find the nearest Standard Chartered Bank

You must bring your passport or a copy of your passport's bio page to the bank when you pay the visa fee. At the bank, you must write your passport number, fee payment amount and your telephone number in the U. S. visa fee collection slip available at Standard Chartered Bank. After receiving your payment, the bank will give you a receipt.


6. Book your appointment 


You can do it from the same website as described from step no 4, here is the link.  
You must wait for 4 hours from the time you paid your fee before you can schedule your interview.

you can find the receipt number in your payment slip / in the online reciept as shown below


Please bring the receipt for your appointment, for online banking you can take the screen shot as above and print it out. 

Choose the earliest slot in the day if possible, please check my guide on the US Visa appointment in Singapore. I wish all the best :) 

Seoul CityPass Plus, Seoul CityPass and M-Pass Difference Review

45 comments
Seoul CityPass Plus, Seoul CityPass and M-Pass Difference Review

T-Money (basic)

The T-money card is rechargeable in amounts ranging from 1,000 won to 90,000 won at any of the T-money vendors or Ticket Vending and Card Reload Devices inside most subway stations.

There's a discount using T-Money, Transfer discounts are applied on bus/subway fares only when using T-money. For instance, when transferring while traveling within a 10km distance, if you use T-money, then transferring is free. This is a much better deal than using cash, as you would have to pay the basic fare each time you transfer. You can transfer a maximum of four times.

T-Money comes in various form: card, accessory and T-Money chip. 

Price: 2,500 won
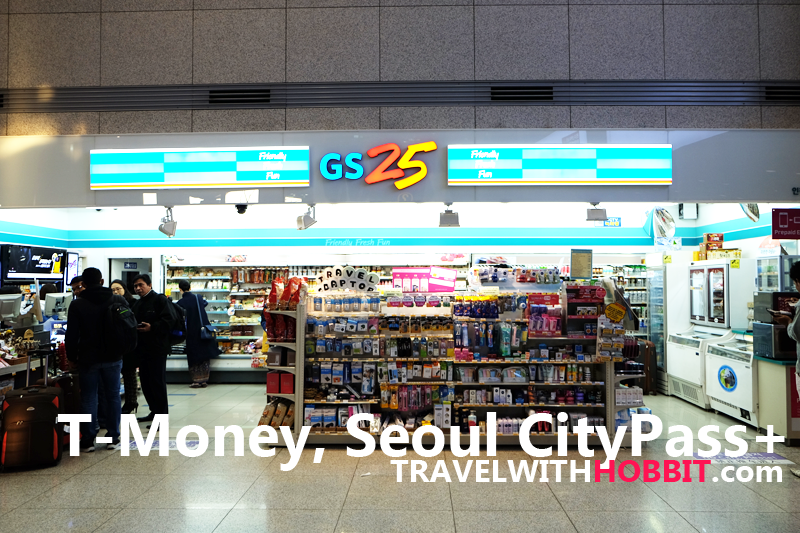
Sales Locations: Convenience stores (GS 25, CU, Mini Stop, Buy The Way, 7-Eleven, Story Way) bearing the T-Money logo and Ticket Vending and Card Reload Devices inside subway stations
Recharge/Refund Locations: All sales locations
for more information click here


Seoul City Pass Plus

for another 500 won you can purchase Seoul City Pass Plus instead of the normal T-Money card. if you are planning to visit the place listed below, the 500 won is worth the money.

Seoul City Pass Plus is a transportation card with the T-money function and additional tourist benefits that can be used in and around Seoul. The card can be used for transactions at four royal palaces (Gyeongbokgung, Changdeokgung, Changgyeonggung, and Deoksugung), Jongmyo Shrine, as well as many convenience stores. The card also offers 5% off rides on the Seoul City Tour Bus and discounts at dozens of tourist sites and shops including restaurants, exhibitions, opticians, and beauty salons.


Price: 3,000 won (Discount guide booklet included)
Sales/Recharge locations: Convenience stores (GS25, CU, Mini Stop, Buy The Way, 7-eleven) bearing the T-money logo
Transportation: Buses, subways, and Seoul City Tour Bus in the Seoul Metropolitan City area
for more information click here


Seoul CityPass (is not Seoul CityPass Plus)


A lot of people getting confuse by this different type of card, with Seoul Citypass card you can use the subway or bus up to 20 times a day, regardless of the distance or mode of transportation, and you can enjoy the Seoul City Tour Bus that take you around the downtown and palaces as many times as you wish.


The Seoul City Tour Bus is a tourist bus that takes you to all of your favorite tourist spots and shopping areas. By using the SEOUL CITY PASS you can board and get off from the bus at any time or place you want, all day, as many times as you like.

Using the coupons provided to you in the SEOUL CITY PASS Guidebook, you can go to famous tourist spots for either free or receive discounts.The bus tours that allow you to use the SEOUL CITY PASS are the downtown tour and the palace tour co as well as the night tour.

SEOUL CITY PASS USERS can receive a 20% discount when going on the night tour.

Price: from 15,000 Won to 35.000 Won
Sales location:
GS25, Family Mart, and MINISTOP convenience stores (located on the arrival floor of Incheon International Airport)
Dongdaemun Tourist Information Office
Gwanghwamun Tourist Information Office
Itaewon Tourist Information Office
Gimpo Airport Tourist Information Office
Samilgyo Tourist Information Office
Myeong-dong Tourist Information Office
Namdaemun Tourist Information Office
Jamsil Tourist Information Office.

This is a picture of GS25 in arrival hall in case you are wondering what it looks like

This is the famous KBooks pciture, a lot of people buying (or ordering) prepaid sim card and send it to this place, for guide you can refer to this link EG sim


M-PASS Card


Metropolitan Pass or M-Pass is a transportation card that offers 20 rides a day for the duration of the pass in the Seoul Metropolitan City area, including Seoul Subway Lines 1-9, Incheon Subway, AREX's (Incheon Airport Railroad Express) standard train (i.e. not the express train), metropolitan trains (except the Sinbundang Line), and Seoul Buses (except red buses).

M-Passes come in five different types: 1-day, 2-day, 3-day, 5-day and 7-day passes. They are valid for the designated time period, and expire at midnight on the last day of validity. (e.g. 3-day M-Pass Activation: January 1, 2014 / Expiration: 11:59 p.m., January 3, 2014)

M-Passes are available for purchase at Seoul Travel Information Centers (I-Tour Seoul Centers) in the Incheon International Airport Passenger Terminal. When buying an M-Pass, you must pay a refundable deposit of 4,500 won, and a non-refundable service charge of 500 won. Also, you will receive discount admission coupons to popular tourist attractions. The deposit as well as any remaining T-money balance on the M-Pass is refunded when you return it to any of the I-Tour Seoul Centers.

Seoul Travel Information Centers (I-Tour Seoul Centers)
  • Locations: Incheon International Airport Passenger Terminal (1F), Exits 5 & 10
  • Price: 10.000 - 59.500 Won
  • Inquiries: +82-32-743-3270
  • Upon purchasing M-Pass, you will receive coupons for discounted admission to tourist attractions and restaurants (10 to 20% off).
M-Pass Refunds (M-Pass must be returned to Seoul Travel Information Centers located in the Incheon International Airport)
  • 4,500-won deposit 
  • Remaining T-money balance 


Conclusion:

It's really depends on your schedule, for me I only spent 23.000 won on my last trip. For Seoul CityPass it maybe worth if you are taking the Seoul City Bus. For M-Pass I don't think you will spend 10.000 won per day for the transport. so the best option that you can consider is to take Seoul City Pass Plus which cost 3000 Won.


How Much Would It Cost For a 8 Days Budget Holiday in Seoul, Korea?

No comments
Not exactly super budget Korea Seoul holiday. As much as I want to get the cheapest option I don't want to sacrifice comfort and convenient too much :p

Hope that this Seoul Korea Budget breakdown can help you to get some idea on how much you will spend for Korea / Seoul trip holiday.

Airplane Ticket from Singapore to Seoul
SGD 1660 / USD 1330 (SGD 830 per person)
How to get a cheap ticket from Singapore to Seoul? Here is quick guide

We went this trip to Seoul in December so the price wasn't the beast deal, after looking around we decided to take Vietnam Airlines. Budget airline was more expensive than this and direct flight it was more than SGD 1000.

TIPS: it's good if you can plan few months in advance to get a cheap ticket (SQ during promotion is about SGD 650 for a direct flight).

Take a look at this guide on how to find a cheap airplane ticket

Accommodation in Seoul 
SGD 608 /  USD490 / 7 nights

we searched the accommodation through Airbnb. we stayed in a Hanok house and apartment.
Hanok SGD 242  for 3 nights
Apartment SGD 366  for 4 nights

Transport in Korea
185.700 KRW / SGD 230 / USD 170 (92.850 KRW / per person)

Here is the breakdown:

T-Money Cards
Bus from Airport to Anguk Station
Top-up T-Money
Bus to Nami Island
Nami Island train
Top-up T-Money
Bus to Sokcho terminal
Taxi to Seoraksan
Taxi Seoraksan to Spa
Taxi Spa to Sokcho Terminal
Bus to Seoul
6000 KRW
20.000 KRW
20.000 KRW
30.000 KRW
4000 KRW
20.000 KRW
6.200 KRW
15000 KRW
8000 KRW
6300 KRW
36.200 KRW

ifyou take out the other transport out of Seoul, we only spent 46.000 KRW / 56 SGD (for two people) to move within the city.

Entertainment: 
232.400 KRW / SGD 286
Secret garden
Siloam Sauna
Nami island entrance
Lotte world
Cable car namsan tower
Seoul tower entrance
Cheoksan Spa
Entry ticket to Seoraksan
Cable car  Seoraksan
16,000 KRW
20,000 KRW
20,000 KRW
78,200 KRW
17,000 KRW
16,200 KRW
40,000 KRW
7,000 KRW
18,000 KRW

Meals
503.000 KRW / SGD 620
This amount includes Snack, Soju, etc.  Below is the rough estimation for some of the famous eating place in Seoul for 2 people.

Kang Ho Dong Baekjeong
Wang Bi Jib
Yoogane
Bonjuk Porridge
Uncle grilled saba fish
O´sulloc Tea House
55,700 KRW
62,100 KRW
22,000 KRW
19,500 KRW
16,000 KRW
16,500 KRW

thetotal expenses for air ticket, accommodation, transport, entertainment and meal we spent about SGD 3404 / USD  2750 for 2 people. Please take a note this doesn't include the shopping, cosmetics and gift.


Budget Seoul Korea Winter Holiday Itenerary

No comments
Budget Seoul Korea Winter Holiday Itenerary
I'm sharing my Winter Seoul Korea Holiday Trip Itinerary for 8 Days and 7 Nights. we prefer a free and easy holiday compared to a planned trip by travel agent, each has their own advantage and disadvantage.

If you are planning for a holiday to Korea or Seoul set your objective first. Free and easy holiday or travel agent. the first giving you flexibility and adventure, the downside is that you need to do a homework (a lot) and a good planning. The second (going by travel agent) can give you a better coverage of the places that you want to visit because the transport has been arranged.

Here is my Winter  Korea trip itinerary:  

Day 1

07:00 Incheon International Airport
08:00 T-Money, Baggage and WiFi Egg
08:30 Aiport Bus to Anguk Station
10:00 Check-in
10:40 Mukshidonna  (Tteokbokki breakfast) Samcheong-dong
11:30 Changdeokgung Palace (we are late for the tour -_-)
12:15 O'sulloc Tea House
13:20 Changdeokgung Palace, Secret Garden Tour
16:30 Ewha Women's University
17:00 Edae Grilled Chicken Skewer
18:30 Siloam Sauna


Day 2

09:20 Shuttle Bus Stop - Insa-dong 
10:40 Nami Island Entrance
11:40 Korean BBQ Beef & Chicken
15:00 Nami Island Ferry
15:30 Shuttle Bus Stop
18:30 Chilgabsan 칠갑산 Insa-dong
20:00 Ssamzie-gil complex


Day 3

09:30 Anguk Station
10:20 Mabongnim Halmeoni Tteokbokki (마복림할머니떡볶이)
13:00 Lotte World
18:30 Bau House Dog Cafe 
21:00 Hapjeong Station

Day 4

10:30 Anguk-Dong
10:40 Jaw Food, Anguk-Dong
11:30 Savoureux
12:30 Hanok House to check-out
14:00 Gongdeok Station
16:30 Kang Ho Dong Baekjeong Korean BBQ (강호동 백정)
17:30 Shopping at Myeongdong
21:00 Myeongdong Gyoza or Kyoja (명동교자)

Day 5

10:00 IFC Mall
12:00 Burger Hunter
15:00 Namsan Cable Car Bus Stop at Seoul Station
15:30 Namsan Cable Car
15:45 Seoul (Namsan) Tower
18:30 Wang Bi Jib 왕비집 Myeongdong

Day 6

05:30 Depart
07:00 Seoul express bus terminal Station
07:30 Depart
10:00 Sokcho Express Bus Terminal (속초고속버스터미널)
10:30 Seoraksan National Park
11:00 Cable Car to Gwongeumseong
14:00 Lunch
15:00 Gangwon-do, Sokcho - cheoksan
17:00 Sokcho Express Bus Terminal
20:00 Seoul Express Bus Terminal Shopping
21:30 Pinocchio Drama First Kiss Location Korea Seoul
22:00 Yoogane Dak Galbi 유가네 닭갈비

Day 7

10:00 Porridge
10:45 Nanta
13:30 Snowflake house cafe
14:00 Myeongdong Shooping
16:00 Saba Fish
19:30 Wang Bi Jib 왕비집 Myeongdong
21:00 Lotte Mart 

A side note: this itinerary was modified on the spot while we are in Korea. There are things that somehow prevent us to follow the planned itinerary but that's part of the adventure :)

We had to let go the trip to Jisan Resort because of my Elf, she injured her knee when we were running from the enemy during the journey to the secret garden.

How much it cost for a 8 days holiday in Seoul, Korea?

What to prepare?
Booking your flight
Transportation
WiFi Egg
Clothes 

Renting Cheap Pocket Wifi Egg in Seoul, Korea

29 comments
There are many WiFi options in Seoul, Korea, you can get free WiFi especially in Seoul's Cafe's and restaurant. 

If you are concern about security, fast and convenient WiFi access, there are some options that you can consider:

1. Olleh KT WiFi Prepaid Card


Olleh WiFi zones are wireless internet hotspots at universities, cultural attractions, shopping malls,
banks and public offices nationwide in Korea provided by KT.

This WiFi Zone coverage is pretty big, almost every major places in Seoul including subway, this is the cheapest option if you do not want to depends on the free WiFi.

You can buy the ID and password online: 1 hour = 1 USD, 1 Day= 3 USD or in Seoul, Korea at G25, 7-11, CU, etc: 1 hour = 1100 KRW, 1 Day = 3300 KRW.

for more information take a look at this link.

2. KT Olleh WiFi Router Egg


KT WiFi Egg rental at 8000 KRW / USD7.5  per day (Discount 50% of rental fee per day after 11 days)

There is a counter at the Arrival Hall Airport.

Try to get the KT WiFi discount coupon (discounted price 5000-6000KRW /USD 4.6- 5.5 per day) at VisitKorea Coupon page.

Email contact: can't find, Domestic 1588-0608 International +82-2-2190-0901
For more information take a look at this link.


3. SK telecom WiFi Egg / Router

SK Telecom rental at KRW 3000 /Day (Device) + KRW 5000/Day (Data).Total: KRW 8000/Day or USD7.5 If the rental period is longer than 6 days, device rental fees are free for the additional period.

There is a counter at the Arrival Hall Airport. 

This is a better option than the KT WiFi Router Egg if you don't have the discount coupon as on the 7th day onwards the rental fee is only KRW 5000 / Day or USD 4.6

Email contact: can't find. Domestic 1599-2011   Overseas+82-2-6343-9000(Press 4)
For more information take a look at this link.


4. Pocket WiFi Korea


Pocket WiFi Korea Egg, they are offering Airport pickup (someone will wait for you at meeting place in the Airport) or they can send it to your hotel / accommodation.

They are 2 types of pocket WiFi Egg
  1. Pocket WiFi Seoul
    Fee USD 3.95 per day (unlimited Data)
    Battery lasts around 8 hours
    Connection Up to 5 devices, Coverage Seoul 
  2. Pocket WiFi Korea
    Fee USD 5.25 per day (unlimited Data)
    Battery lasts around 5 hours
    Connection up to 5 devices, Coverage Nationwide (including Nami and Jeju) 
Email contact: contact@pocketwifikorea.com
For more information take a look at this link


5. LG U+ WiFi Egg


Operated by LG
Wireless router that allows high-speed data transfer via LTE
Up to 3 devices including smartphones, tablet PC, and laptops can use Wi-Fi access simultaneousl
Fits in your pocket! Your pulse! Micro-sized minimal design

LG U plus WiFi Egg rental at KRW 3000 /Day (Device) + KRW 5000/Day (Data).Total: KRW 8000/Day or USD7.5  If the rental period is longer than 5 days, device rental fees are free for the additional period.

Personally I like this WiFi Egg, this is cheaper than KT Olleh / SK Telephone. The device is nice and slim, during my Korea stay I don't have any issue using this WiFi Egg in Seoul / Seorak Mountain / Nami island. Device can last for 3-5 hours (they could also lend you and extra battery at no additional charge). 

LG U+ counter at Arrival and Departure has much lesser queue compared to SK and KT, so this is a plus especially when you are rushing on the way back.

I've also got an additional discount because I book the device in advance: "E-mail us before 3 days you come to Korea!!!!!!  You can get discount from Daily rental fee(3,000 > 1,500 won)"

Email contact: lgrental@lguplus.co.kr 

for more information take a look at this link.


TIPS:

1. Send them email (and book) way in advance and ask them for discount. their replies are quite slow, sometimes it can take 2-3 days for a single reply. You can try to call them but it's better to get a written confirmation.

2. look for discount coupon and compare the price. try to use Google with a keyword "KT Olleh discount" and put the search limit for a month / week to get the latest discount.

3. Print Screen your booking confirmation or print it out, just in case they can't find your booking.

4. Bring a power bank (recommendation: buy a Xiaomi power bank), in cold weather your battery will deplete faster.

5 Sometimes is better to pay more for convenient and efficient service.

6. Always check the WiFi Egg and the accessories given. Try to connect to your device as well before leaving the counter.

How to Get Cheap Travel Holiday Flight Ticket From Singapore

1 comment
Planning to travel or holiday soon? plan ahead to get a cheap ticket.

1. Find a cheap flight during a low season

Use this website hopper.com as a rough guide to check the ticket price across the season.

Enter From and To, then click view report


The website will give you a recommendation on the price that is considered as a good deal and cheapest time to go.

2. Find a cheap ticket using SkyScanner


Compare prices from different Airlines at one go at SkyScanner.com

after you find it, go to the respective airlines' website to buy your ticket. In my opinion, it's always better to buy directly from the airlines compared from third party.

3. Get a local touch by searching using a local travel agent website

I recommend Muhibbah for a local travel agent, the price might not be the cheapest but it's good to use it as comparison and they are pretty fast replying email.

Go to their website http://www.muhibbahtravel.com/

Go to airfares and click flight, you can do a search by clicking book online now.


you can also book your flight immediately, normally you are given 1 - 2 days buffer to complete the payment, they can also send the ticket to your place.

TIPS on how to get a cheap flight ticket


  1. Compared the price at least from 2 different websites + budget Airlines (nowadays budget airline can be expensive)
    Skyscanner.com
    Zuji.com
    Asiatravel.com
    Muhibbahtravel.com
    Newshan.com
    Airasia.com (budget)
    Flyscoot.com (budget)
    Jetstar.com (budget) Jetstar can do a price beat: info
    Tigerair.com (budget)
  2. Include local travel agent in your search, you might find a discount applicable only in your country.
  3. Choose a direct flight if possible, it's not fun waiting in airport for 4-5 hours except if the price different is big.
  4. Do not buy from a different airline for your connecting flight. Stick to one airlines, just don't risk it, believe me.
  5. Always buy from the airline directly, it's cheaper (third party charge service fee/ handling cost) also you might get the current promotion in their website (most of the airline website has a promotion page)
  6. You can use Google search to find the current promotion
    1. use the keyword "airline name discount" or "airline name promotion" e.g cathay promotion, korean air discount
    2. click the search tools and choose the country and time frame to narrow down to the latest promotion.


no
no